moonstone
Tyre Kicker
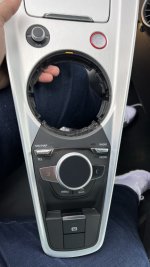
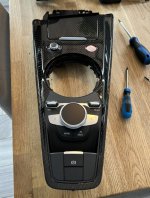
If you've bought a new centre console or want to remove your existing one for another reason, here's a step-by-step guide on how to take it out and swap the controls to a new one.
Tools needed:
Here's an outline of the steps required before I get into the specifics.
Method:
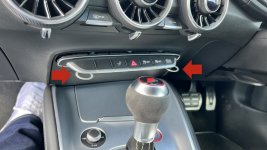
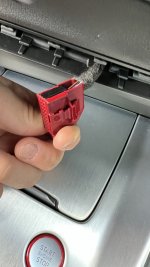
First we're going remove the main switch bank by pushing two radio keys into horizontal slots on either side, located under the row of switches. Once these are pushed in, you can pull the entire switch bank assembly out. Be gentle as there is an electrical connector at the back of it, that you need to release by squeezing a tab on the connector and pulling it out.
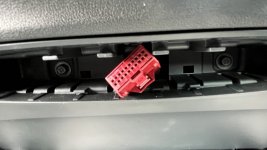
Once you remove the switchbank unit, you'll see two 8mm hex bolts inside that need to be removed. Once you’ve unscrewed these, you can then pop the fascia surround out, which is held in by two push-tabs on either side.
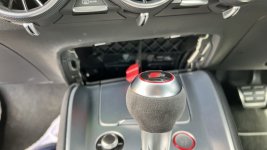
Next up, you want to remove the gearshift gaiter (or DSG surround) from the main centre console piece. The reason for this is that removing the gear knob is a bit of extra hassle and if you do so on a DSG, there's a risk the trigger on the knob can be stuck in and it's a major ballache to get it back out without damaging the gear knob.
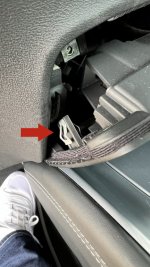
On the DSG unit you can simply grab the gaiter and pull to release the gaiter surround and collar together. The you unclip the gaiter collar from underneath by pushing in the clips as showing below. Make sure you unclip the electrical connector as well.
You’ve now got enough clearance to remove the centre console unit without taking the gear knob off. Note that you’ll want to move the gear shifter forward to give you enough room to pull the console unit up from the back (see below).
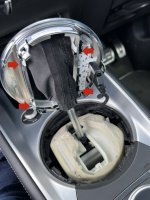
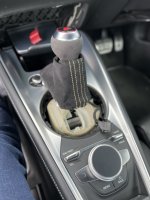
Now that's done, you can remove the main console unit. This is held on by a number of push clips, the same as those that held the switch bank fascia in place. Best option is to get a trim removal tool and carefully prise it up on each side to loosen it. CAUTION: There is a small gap between the brushed metal finish and the plastic below. Make sure you lever up from under the plastic and NOT under the metal or you'll bend up the metal trim.
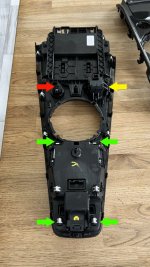
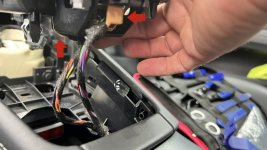
Once you pull-up up half way, you'll have a number of electrical connectors to release. These engage in the direction of the arrows in the photo below, so pull them the opposite way.
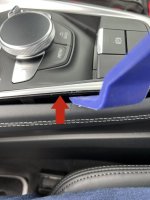
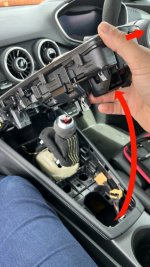
Once all the connectors are undone you can then pull the console unit up from the rear and out as shown by the arrows below.
Tools needed:
- Trim removal tools
- Pliers
- 8mm hex socket
- torx drivers
Here's an outline of the steps required before I get into the specifics.
- Remove centre switch bank.
- Remove centre switch bank fasica surround.
- Remove gear gaiter/DSG selector trim.
- Remove main centre console surround.
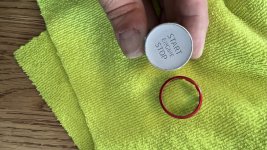
- Swap controls from old surround to new one.
- Re-fit in reverse order.
Method:
First we're going remove the main switch bank by pushing two radio keys into horizontal slots on either side, located under the row of switches. Once these are pushed in, you can pull the entire switch bank assembly out. Be gentle as there is an electrical connector at the back of it, that you need to release by squeezing a tab on the connector and pulling it out.


Once you remove the switchbank unit, you'll see two 8mm hex bolts inside that need to be removed. Once you’ve unscrewed these, you can then pop the fascia surround out, which is held in by two push-tabs on either side.


Next up, you want to remove the gearshift gaiter (or DSG surround) from the main centre console piece. The reason for this is that removing the gear knob is a bit of extra hassle and if you do so on a DSG, there's a risk the trigger on the knob can be stuck in and it's a major ballache to get it back out without damaging the gear knob.
On the DSG unit you can simply grab the gaiter and pull to release the gaiter surround and collar together. The you unclip the gaiter collar from underneath by pushing in the clips as showing below. Make sure you unclip the electrical connector as well.
You’ve now got enough clearance to remove the centre console unit without taking the gear knob off. Note that you’ll want to move the gear shifter forward to give you enough room to pull the console unit up from the back (see below).


Now that's done, you can remove the main console unit. This is held on by a number of push clips, the same as those that held the switch bank fascia in place. Best option is to get a trim removal tool and carefully prise it up on each side to loosen it. CAUTION: There is a small gap between the brushed metal finish and the plastic below. Make sure you lever up from under the plastic and NOT under the metal or you'll bend up the metal trim.
Once you pull-up up half way, you'll have a number of electrical connectors to release. These engage in the direction of the arrows in the photo below, so pull them the opposite way.


Once all the connectors are undone you can then pull the console unit up from the rear and out as shown by the arrows below.

Last edited:

