moonstone
Tyre Kicker
"Auto Hold" is often confused with "Hill Hold". Hill hold is standard on DSG TTs (not sure about manual cars) and holds the brake a bit on a hill to make is easier for you to set off. Auto-hold on the other hand, holds the brake for you when you take your foot off when stationary and still in (D). Means you don't need to keep your foot on the brake at traffic lights or manually engage the handbrake.
I retrofitted his recently using Kufatec's kit (available here: https://www.kufatec.com/en/audi/tt/...o-hold-hill-start-assist-for-audi-tt-8s-41562)
This kit comprises a genuine VAG button that replaces your existing Parking Brake button, a OBD dongle that automates the coding process and a simple wiring loom. The instructions are pretty rubbish and are for a LHD car. They're not clear on various things and I went through a lot pain to fit this only to realise, in the end, that with the job is actually much simpler than it seems. (NOTE: This is why in some of my photo's the car has more trim stripped than I actually outline in my steps below)
The switch itself costs around £30-£40 and if you are a VCDS or OBDeleven user, it's possible to code this in yourself. The wiring loom requires a few female pin connecters that are designed to slot into the existing electrical connectors though so the best idea (if not going down the KUFATEC route) is to try and get a pre-made loom rather than try to make one yourself (unless of course, you have the kit to do so). Note that KUFATEC also sells the loom on its own.
PLEASE READ THIS ENTIRE POST IN ITS ENTIRETY AND MY FOLLOW UP POSTS BEOFRE STARTING.
Tools needed:
Here's an outline of the steps required before I get into the specifics.
It doesn't really matter what order you decide to start with, but in this case I'll start with replacing the existing (P) button with the new unit. The whole control unit needs to be lifted out but rather than remove the centre console entirely you can simple remove the gear surround trim and pull the top of the edge of the MMI control unit up. Then using your trim removal tools, prise up the back end of the centre console unit to give you access to the rear set of clips that holds the MMI control unit in place. Once you release these, you can drop the centre console unit back down and then remove the two electrical connectors going to the MMI unit.


Below you'll see the two prongs at the rear that need to be squeezed to release the back of the MMI unit from the console.

Now that the console is out, there's a few small clips on the back that hold the switch in place. Pop it out and stick in the new one.

Now before you put the controller unit back in, you'll be adding a couple of wires to the connector, so leave everything out for the time being and head towards the engine bay. From the engine bay, we need to feed the supplied cable through a rubber grommet in the firewall through to the passenger compartment. It's really hard to photograph but just behind and to the right of the ABS Pump there's a larger grommet with the main wiring loom coming from it and a smaller rubber nipple sticking out below it. We're going to stick a hole in this with a philips head screw driver and feed the wiring loom through it. The wiring loom is going to join two cable from the ABS unit to the new switch.
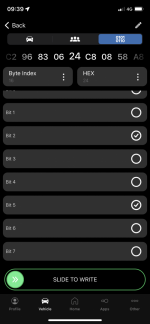
In the KUFATEC kit, the wires are labelled with pin numbers on each wire. So feed the cable through the right way round. At the ABS Unit side, it's the two wires labelled Pin 23 & Pin 32.

In the photo below after you feed through your cable rod through the hole in the nipple, it'll come out into the cabin behind the glove box. You might get lucky and it wont end up behind the footwell trim but if it does, you'll need to remove that as shown in the pic. After that you can tape the wiring loom to it and pull it through into the engine bay.


Next up we're going to remove the connector plug from the ABS unit, take the back off and then insert the pins from the wiring loom into it. In order to release the connector from the ABS unit you need to pull out a red tab by moving it downwards and that lets you release the grey lock before unplugging the connector itself


Now that the connector is released, you need to get the back off it to access the back of the connector. You do this by pressing in this slot and gently pulling the cover off.

I retrofitted his recently using Kufatec's kit (available here: https://www.kufatec.com/en/audi/tt/...o-hold-hill-start-assist-for-audi-tt-8s-41562)
This kit comprises a genuine VAG button that replaces your existing Parking Brake button, a OBD dongle that automates the coding process and a simple wiring loom. The instructions are pretty rubbish and are for a LHD car. They're not clear on various things and I went through a lot pain to fit this only to realise, in the end, that with the job is actually much simpler than it seems. (NOTE: This is why in some of my photo's the car has more trim stripped than I actually outline in my steps below)
The switch itself costs around £30-£40 and if you are a VCDS or OBDeleven user, it's possible to code this in yourself. The wiring loom requires a few female pin connecters that are designed to slot into the existing electrical connectors though so the best idea (if not going down the KUFATEC route) is to try and get a pre-made loom rather than try to make one yourself (unless of course, you have the kit to do so). Note that KUFATEC also sells the loom on its own.
PLEASE READ THIS ENTIRE POST IN ITS ENTIRETY AND MY FOLLOW UP POSTS BEOFRE STARTING.
Tools needed:
- Trim removal tools
- Cable rods / pullers
- Philips screw driver
- Electrical terminal extraction keys (https://www.ebay.co.uk/itm/225042597327) or a very small screwdriver to push out a couple of pin blanks on the ABS connector.
Here's an outline of the steps required before I get into the specifics.
- Loosen centre console trim to release the switch main switch bank and replace the switch.
- Run new wiring loom from switch connector to ABS module in the engine bay.
- Coding.
It doesn't really matter what order you decide to start with, but in this case I'll start with replacing the existing (P) button with the new unit. The whole control unit needs to be lifted out but rather than remove the centre console entirely you can simple remove the gear surround trim and pull the top of the edge of the MMI control unit up. Then using your trim removal tools, prise up the back end of the centre console unit to give you access to the rear set of clips that holds the MMI control unit in place. Once you release these, you can drop the centre console unit back down and then remove the two electrical connectors going to the MMI unit.
Below you'll see the two prongs at the rear that need to be squeezed to release the back of the MMI unit from the console.
Now that the console is out, there's a few small clips on the back that hold the switch in place. Pop it out and stick in the new one.
Now before you put the controller unit back in, you'll be adding a couple of wires to the connector, so leave everything out for the time being and head towards the engine bay. From the engine bay, we need to feed the supplied cable through a rubber grommet in the firewall through to the passenger compartment. It's really hard to photograph but just behind and to the right of the ABS Pump there's a larger grommet with the main wiring loom coming from it and a smaller rubber nipple sticking out below it. We're going to stick a hole in this with a philips head screw driver and feed the wiring loom through it. The wiring loom is going to join two cable from the ABS unit to the new switch.
In the KUFATEC kit, the wires are labelled with pin numbers on each wire. So feed the cable through the right way round. At the ABS Unit side, it's the two wires labelled Pin 23 & Pin 32.
In the photo below after you feed through your cable rod through the hole in the nipple, it'll come out into the cabin behind the glove box. You might get lucky and it wont end up behind the footwell trim but if it does, you'll need to remove that as shown in the pic. After that you can tape the wiring loom to it and pull it through into the engine bay.
Next up we're going to remove the connector plug from the ABS unit, take the back off and then insert the pins from the wiring loom into it. In order to release the connector from the ABS unit you need to pull out a red tab by moving it downwards and that lets you release the grey lock before unplugging the connector itself
Now that the connector is released, you need to get the back off it to access the back of the connector. You do this by pressing in this slot and gently pulling the cover off.
Last edited: